![]()
![]()
![]()
![]()
|
|
|
|
|
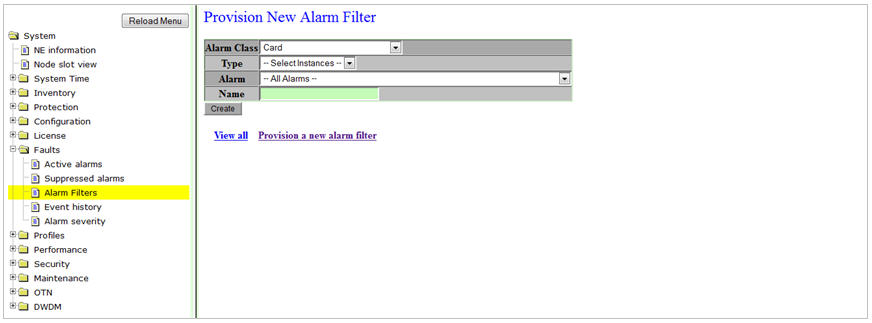
Perform the steps given below to provision an alarm filter.
A click on View all link will direct you to the View Alarm Filter preview pane.
A click on Provision a new alarm filter link will direct you to the Provision New Alarm Filter preview pane.
Provision New Alarm filter parameters
Parameter |
Description |
Default Value |
Acceptable Value |
|---|---|---|---|
Alarm Class |
Click on the drop down option and select the object on which the alarm filter has to be provisioned. |
Card |
-- |
Type |
The type of the managed object. For example, if the Managed Object is 'Port', the Type is all the ports available on the node. If the Managed Object is 'Card', the Type is all the cards available on the node. |
Depends on the option selected for the Alarm Class parameter |
Options from the drop down menu |
Alarm |
Allows you to select the type of alarm. |
All Alarms |
All configured alarms on the node. |
Name |
Allows you to provide a name for the new alarm filter. |
-- |
Alphanumeric characters |