![]()
![]()
![]()
|
|
|
|
Click ![]() to add a Configuration Template.
to add a Configuration Template.
NCCM supports nine different types of Templates and each type is used for specific requirement. They are
Command Execution is used to execute a series of command (one by one) on devices, which is similar the user executing commands through putty application for
configuration changes. This template type should be used for changing small set of configurations which does not roll back to previous ones.
Click Command Execution and click Ok to proceed further.
Click Template Configurations panel.
Click Access Control panel
NOTE: If the visibility is “Private”, User and User group ropdown will be enabled and selected user and administrator will only be able to manage this template.
Example for Command Execution:
<command prompt=”#”>conf t</command>
<command prompt=”#”>hostname {{Rumtime.xxxx}} </command>
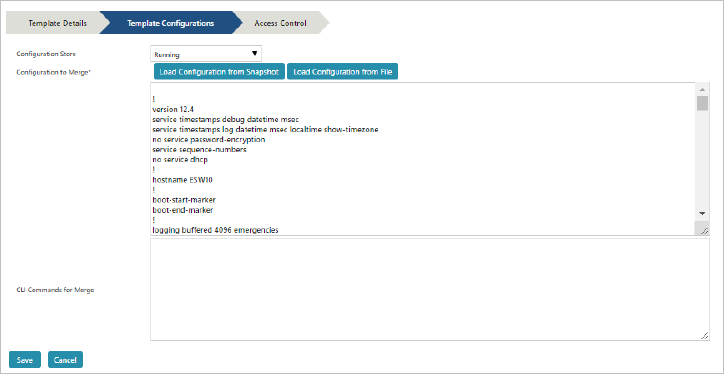
Configuration Merge is used to upload or merge a command block into Device. This type should be used for creating or merging a configuration block into device.
Click Configuration merge and click Ok to proceed further.
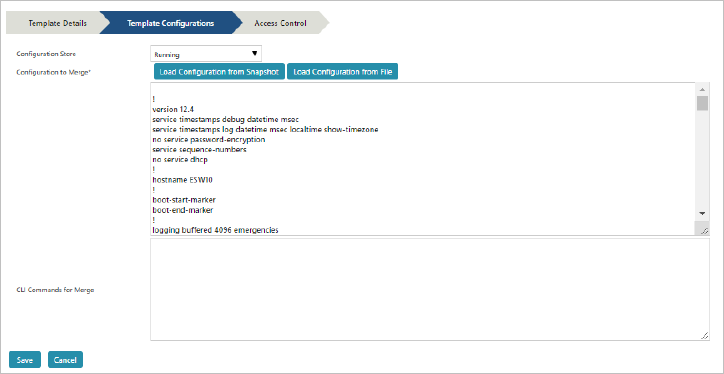
Example Commands to Merge:
<command prompt="\]\?">copy tftp: running-config</command>
<command prompt="\]\?">{{Global.managementIP}}</command>
<command prompt="\]\?">{{Job.uploadfilename}}</command>
<command previous_match="confirm\]" prompt="#" timeout="300">yes</command>
<command action="exit" prompt="">exit</command>
NOTE: NCCM will auto fill the “Configurations to merge commands” into Job object uploadfilename variable.
The rest of the inputs are similar to “Add Command Execution”.
Configuration Replace is used to replace a full configuration into device. This should be used for replacing default or configuration discrepancies with backed up configuration version.
Click Configuration Replace and click Ok to proceed further.
Example Commands to Replace:
<command prompt="[\],#]" timeout="300">configure replace tftp://{{Global.managementIP}}/{{Job.uploadfilename}}</command>
<command previous match="confirm\]" prompt="#" timeout="300">y</command>
<command action="exit" prompt="">exit</command>
NOTE: NCCM will auto fill the “Configurations to Replace commands” into Job object upload filename variable.
The rest of the inputs are similar to “Add Command Execution”.
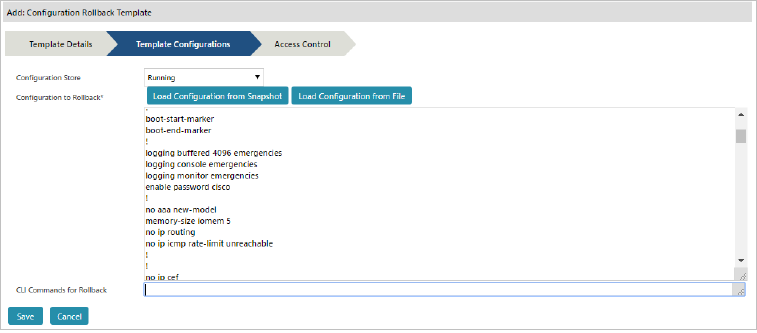
Configuration Rollback template will Roll the device configuration back to its previous configuration version.
Click Configuration Rollback and click Ok to proceed further
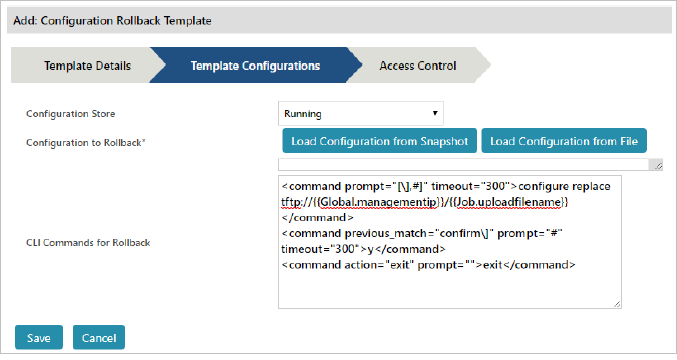
Example Commands to Rollback:
<command prompt="[\],#]" timeout="300">configure replace tftp://{{Global.managementIP}}/{{Job.uploadfilename}}</command>
<command previous_match="confirm\]" prompt="#" timeout="300">y</command>
<command action="exit" prompt="">exit</command>
NOTE: NCCM will auto fill the “Configurations to Rollback commands” into Job object upload filename variable.
BASELINE-STARTUP-CONFIGURATION
NCCM will roll back the Baseline Startup configuration of the corresponding device.
PREVIOUS-STARTUP-CONFIGURATION
NCCM will roll back the previous startup configuration of the corresponding device.
BASELINE-RUNNING-CONFIGURATION
NCCM will roll back the baseline running configuration of the corresponding device.
PREVIOUS-RUNNING-CONFIGURATION
NCCM will roll back the previous running configuration for the corresponding device.
NOTE: Tags will be used while Replacing Configurations on multiple devices, at the same time.
The rest of the inputs are similar to “Add Command Execution”.
Example with Actual configuration to replace:
Example with TAG input configuration to replace:
NOTE: Before creating a “Roll Back upload job” or “Auto creation of Rollback Job” from Upload Job Task Result, Configuration Replace templates should be created in NCCM for each vendor & OS Type and Template should follow naming standards.
Name of the Replace Template should be
Example for CISCO IOS
Configuration Rollback to Base - TEJAS ALLTYPE
Configuration Rollback to Previous - TEJAS ALLTYPE
Example for CISCO NXOS
Configuration Rollback to Base – TEJAS ALLTYPE
Configuration Rollback to Previous – TEJAS ALLTYPE 140 NCCM User Guide
Example for CISCO any OS type
Configuration Rollback to Base – TEJAS ALLTYPE
Configuration Rollback to Previous – TEJAS ALLTYPE
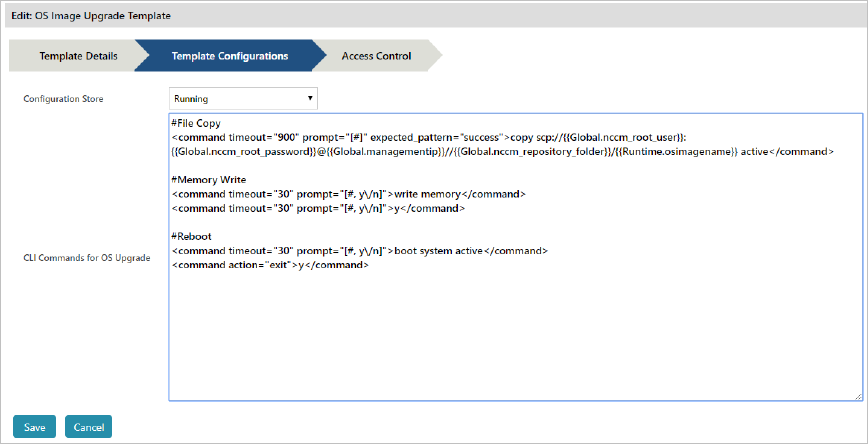
OS Image upgrade is used to upgrade the OS Image or OS Patch update into device.
Click OS image upgrade and click Ok to proceed further.
Example for Tejas TejOS Upgrade:
#File Copy
<command timeout="900" prompt="[#]" expected_pattern="success">copy scp://{{Global.nccm_root_user}}:{{Global.nccm_root_password}}@{{Global.managementip}}//{{Global.nccm_repository_folder}}/{{Runtime.osimagename}} active</command>
#Memory Write
<command timeout="30" prompt="[#, y\/n]">write memory</command>
<command timeout="30" prompt="[#, y\/n]">y</command>
#Reboot
<command timeout="30" prompt="[#, y\/n]">boot system active</command>
<command action="exit">y</command>
NOTE:
NCCM also supports md5 checksum, and Activation Key for Tejas IOS Upgrade in command template variable substitution and check constraint check.
In case of other vendors and Cisco other OS Types, OS Upgrade template should be built as per vendor command standard
Before creating an “OS Image Roll Back Upload Job” automatically from OS Upload Job Task Result, OS Upgrade templates should be created in NCCM for each vendor & OS Type and Templates should follow naming standards. Name of the Template should be
“OS Image Upgrade - <Vendor> <OS type>”
Example for TEJAS ALLTYPE
OS Image Upgrade - Tejas Alltype
The rest of the inputs are similar to “Add Command Execution”.
Network Task Automation is similar to Command Execution Template which executes a series of commands, one by one.
This template should be used for Network Automation tasks like Health Check, Trace Route, Backing up important data’s, finding device service configurations like “SNMP Status, BGP Status, SSH Status, TFTP reachability” regularly.
Click Network Task Automation and click Ok to proceed further.
The rest of the inputs are similar to “Add Command Execution”.
Example:
If we have to check important application servers availability from core router on a daily basis, write the below command in the template.
<command prompt=”#” timeout=30>ping 192.168.50.235</command>
NETCONF merge is used to merge the given configurations into existing device configuration (Applicable only for NETCONF protocol supporting devices).
Click NETCONF Merge and click Ok button to proceed further.
The rest of the inputs are similar to “Add Command Execution”.
Replace full configuration into existing device configuration (Applicable only for NETCONF protocol supporting devices).
Click NETCONF Replace and click Ok to proceed further.
The rest of the inputs are similar to “Add Command Execution”.
This is similar to Command Execution Template which executes a series of commands, one by one. This template should only be used for Network Diagnosis tasks like Health Check, Trace Route, finding device service configurations like “SNMP Status, BGP Status, SSH Status” on an adhoc basis.
Click Network Diagnosis and click Ok to proceed further.
The rest of the inputs are similar to “Add Command Execution”.
NOTE: Network Diagnosis Template will be used in “Network Diagnosis feature” by service engineers
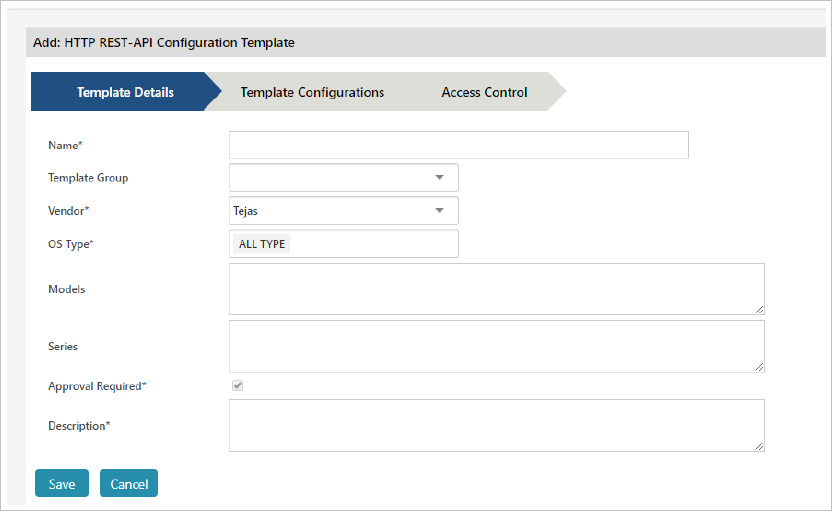
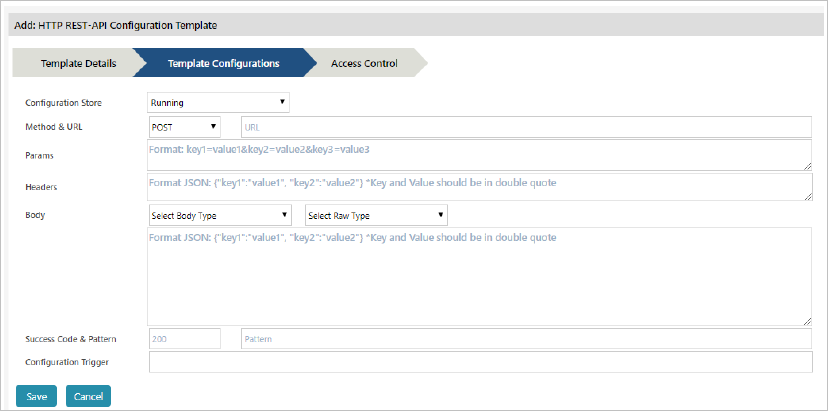
This option is used to perform Network and service configurations through HTTP (REST) API. It takes HTTP(S) URL, Headers, Form or RAW JSON content to execute a configuration change.
Click HTTP REST-API Configuration and click Ok to proceed further.
Click Template Configurations panel.
Click Access Control panel
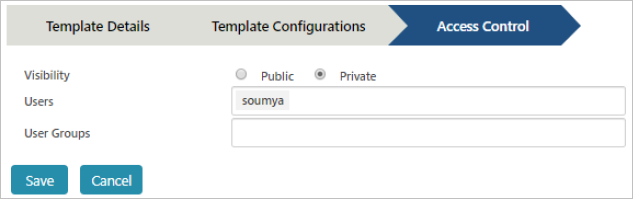
NOTE: If the visibility is “Private”, User and User group dropdown will be enabled and selected user and administrator will only be able to manage this template.
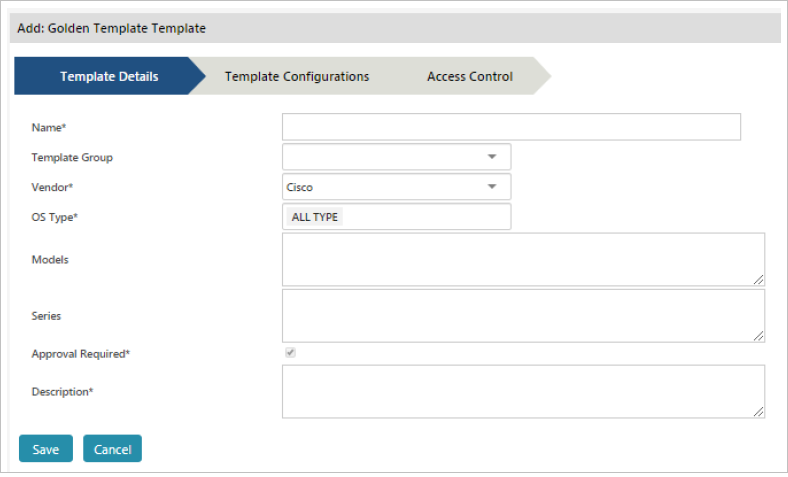
This feature will be used to identify the missing and additional configurations across the devices, based on a standard template defined by the organization.
NOTE: This is just a placeholder to save the Golden Template commands and not to be used to execute.
Click Golden Template and click Ok to proceed further.
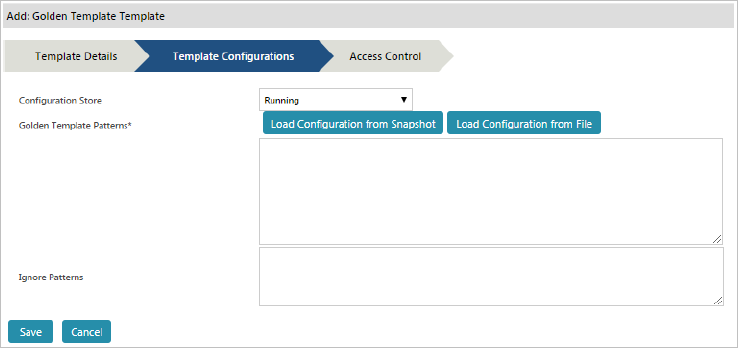
Click Template Configurations panel.
Click Access Control panel.
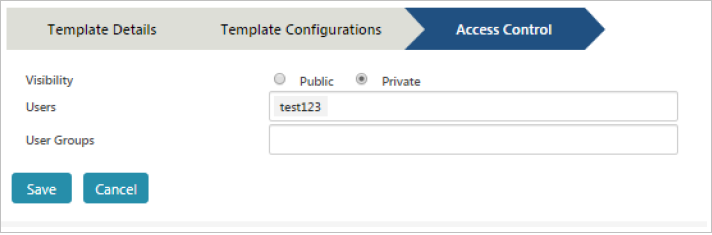
NOTE: If the visibility is “Private”, User and User group dropdown will be enabled and selected user and administrator will only be able to manage this template.