Add Auto Report Schedule
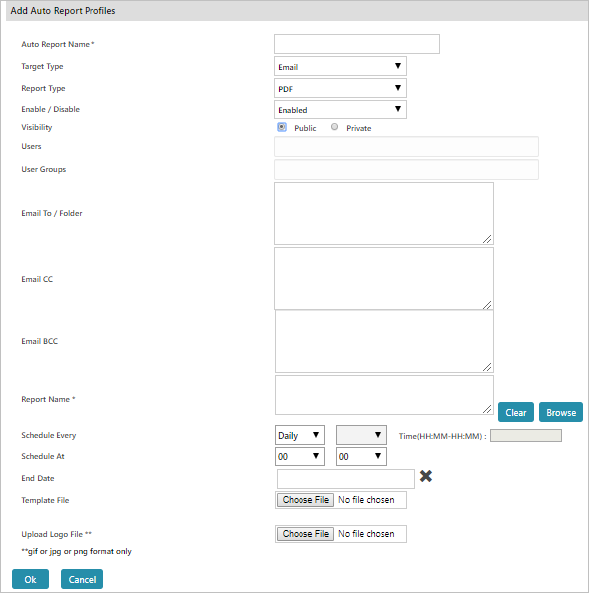
To add a report, click  . The Add Auto Report Profiles page appears.

- Provide a name for the Auto Report.
- Select Target Type using the dropdown menu.
- Select a Report Type using the dropdown menu.
- Select ‘Enable’ to enable the auto report.
- Select Visibility (Public/Private).
- If Private, select the user(s).
- Input the email ID, to mail the report. Or, enter the folder location where the report must be saved.
- In ‘Email CC’ field, input the additional email ID’s to send a copy.
- In ‘Email BCC’ field, input the email ID’s to send blind copies of the email.
- Select the Report Name using Browse option.
- In ‘Schedule Every’ field, select the report delivery details.
- In Schedule At, select a start day.
- For the End Date, use the calendar view to select an end date.
- Click Ok to schedule the offline report or click Cancel to abort the operation.
![]() . The Add Auto Report Profiles page appears.
. The Add Auto Report Profiles page appears. 