4 Tracker
This chapter describes the operations available in the Tracker option menu.
Following are the available options:
• Account
• Projects
Figure 3:  Page showing list of accounts
This section describes how to access your account. Click Tracker->Accounts option to access account page.
Following are the available options:
— Add New Account: Click Add New Account button to add new account.
— Generate Statistics: Click Generate Statistics button to generate usage statistics.
4.2.2 List of available accounts
This section describes table showing list of available accounts. Following are the three columns:
— Sl No: Serial number is used to enumerate the available account
— Account Name: Displays the name of the account
— Timestamp: Displays the date and time of creation.
This section describes how to create new account.
1. To create a new account, click Add New Account button and the form appears.
2. Following are the available parameters:
— Name of the Account: Provide name of the account.
— Description of the Account: Allows user to add a small description of the account.
— Projects: Select the desired project/projects from the left side box.
NOTE: Projects appear once created.
3. Fill the form and click Submit to save data.
4.2.4 Generate usage statistics
This section describes how to generate usage statistics.
a. Non admin users
To generate usage statistics, click Tracker->Accounts->Generate Statistics button.
Following are the available parameters for non admin users:
• Projects
• Networks
• RWA
• Network designs
• Link engineering designs
b. Admin users
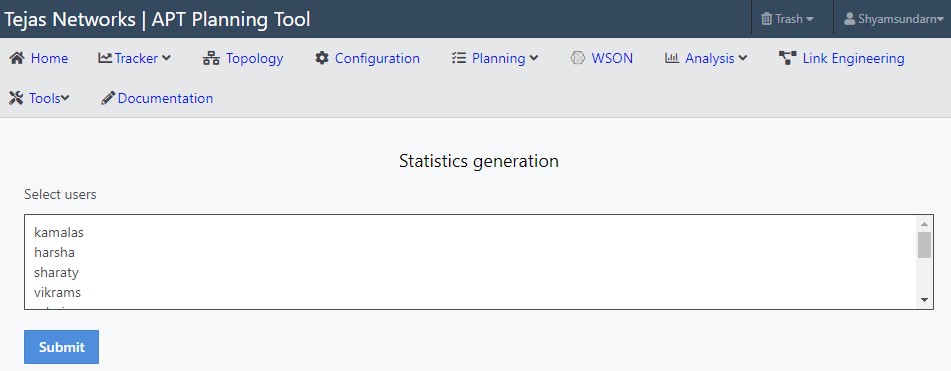
To generate usage statistics, click Tracker->Accounts->Generate Statistics button. The Statistics generation page appears as follows.
Figure 4:  Admin usage statistics form
Follow the steps:
• Select users: Select the desired user/ users to generate usage statistics and the statistics is sent to email id in excel format.
• Fill the form, click Submit button.
This section describes how to access projects.
Click Tracker->Projects, project page appears.
Figure 5:  Page showing list of projects
This section describes available buttons in Projects. Following is the button available:
Add New Project: Click Add New Project button to add a new project.
4.3.2 List of available projects
This section describes table showing list of all available projects. Following are the four columns:
1. Sl No: Serial number is used to enumerate the available projects.
2. Project Name: Displays name of the project.
3. Account Name: Displays name of the account.
4. Actions: This column has maximum one button as follows:
— Open or Closed: If the project is open, then button name is Open. To close the project click Open button. After closing the project button name is changed to Closed.
This section describes how to create new project. Follow the steps to create new project.
1. To create a new project, click Add New Project button and the form appears.
2. Following are the available parameters:
— Name of Project: Provide name of the project
— Select the Account: Select the desired account from the drop-down list
— Description of the Project: Allows user to add a small description of the project
— Networks: Select the desired network/networks from the left side box:
3. Fill the form and click Submit to save project.
Figure 6:  Form to add new project