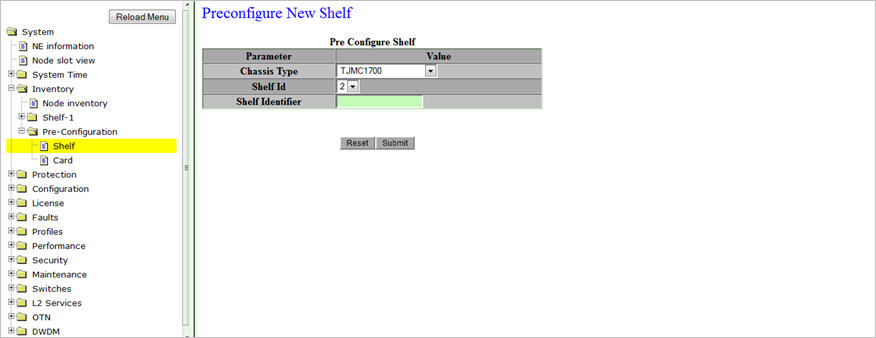
The Shelf option under Pre-Configuration allows you to add new Shelf and Rack Shelf to the Master Shelf. The "Shelf Mode" of the added Shelf/Rack Shelf will be displayed as 'Slave' on Node Inventory pane.
'Shelf' refers to a physical chassis like TJ1600-11 or TJ1600 Type-6SR added to Master Shelf through Management port using LAN cable. Cards present on the Shelf will get detected automatically by the Master Shelf on successful connection. On the other hand, 'Rack Shelf' refers to TJ1600-2 Passive or other passive units that are required to be added to the Master Shelf in order to be identified for its management. It is a virtual shelf that acts like a card holder and does not require power.
Perform the steps given below to add a Shelf and a Rack Shelf to the Master Shelf node WUI.

> click on Chassis Type drop down option and select the chassis as 'TJMC1700' or 'TJMC16006' or 'TJMC16002_Passive'. TJMC1700 represents TJ1600-11 chassis, TJMC16006 represents TJ1600 Type-6SR chassis, and TJMC16002_Passive represents TJ1600 Type-2SR Passive chassis.
> click on Shelf Id drop down option and select the desired identifier to be used to for that chassis. The acceptable value ranges from 2 to 8; 1 is reserved for the Master Shelf by default, hence allowing a maximum of 7 shelves that can be added to the Master Shelf.
> enter the Shelf Identifier in the text box provided. Acceptable values includes any alphanumeric character.
> click on Chassis Type drop down option and select 'RACKSHELF'. The Shelf Id field is not editable for Rack Shelf and will display the value 0 by default. Note that every new Rack Shelf added successfully will be assigned a Shelf Id starting from 50 onwards, which will get displayed on Node Inventory pane.
> enter the Shelf Identifier in the text box provided. Acceptable values includes any alphanumeric character. Note that this shelf identifier value will get displayed in brackets on RACKSHELF tab on Node Inventory pane.
Add New Shelf link will direct you to the Preconfigure New Shelf preview pane.