![]()
![]()
![]()
|
|
|
|
The below admin operations can be performed from this page.
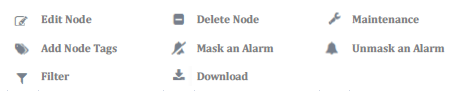
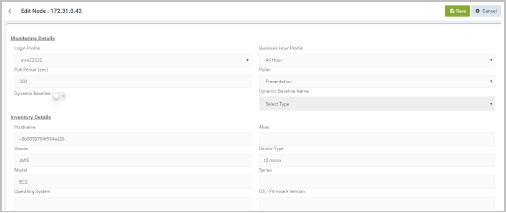
The Edit Node option in Node View page allows the user to edit the Node parameters. To edit a node, select the node and click ![]() .
.
Make changes as required. Click Save to save changes or Cancel to discard.
To delete a node, select the node and click select the alert and click ![]() .
.

Review the details and Select Confirm to delete or Cancel to cancel deletion.
The user may want to subject certain resources to a maintenance state where Devices, equipment’sor servers are not polled and alarms are not raised.
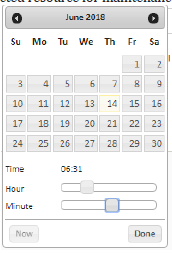
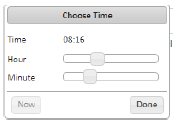
To add a node, to maintenance, select the node and click ![]() .
.
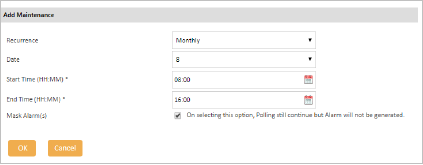
There are four types of Maintenance, they are:
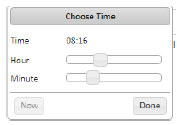
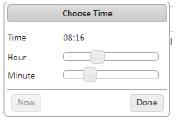
ADD MAINTENANCE - NON-RECURRING
This type of maintenance is applicable for a one-time instance, and cannot be repeated. By default, “Non-Recurring” is selected from Recurrence dropdown.
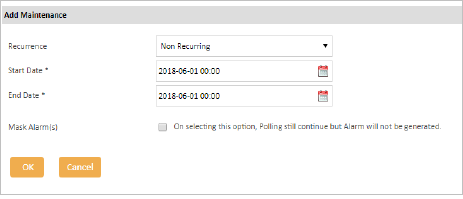
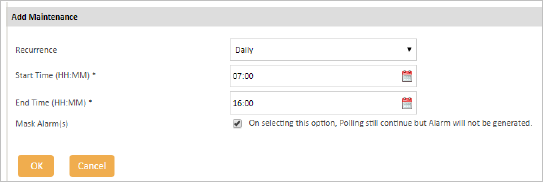
ADD MAINTENANCE – DAILY
This type of maintenance is applicable for adding resource(s) for maintenance, every day for specific time duration.
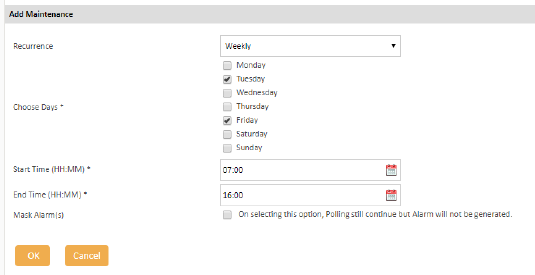
ADD MAINTENANCE – WEEKLY
This type of maintenance is applicable for adding resource(s) for maintenance, once a week, on the specified day and time.
ADD MAINTENANCE – MONTHLY
This type of maintenance is applicable for adding resource(s) for maintenance, once a month on the specified date and time.
To view the resources, that are under maintenance, from the main menu select Configuration -> Maintenance. From this page, we can edit or delete the maintenance configuration.
To edit a resource’s maintenance, select the resource and click ![]() .
.
From the Maintenance page, select the resource(s) that needs to be deleted and click ![]() .
.

Click Yes to confirm deletion or No to cancel.
NOTE: Though the Maintenance is page is accessible from ‘’Configuration’ menu, resource(s) could be added to maintenance only from the Node page. Refer Maintenance module for more details.
Tag is a simplified name, assigned for a group i.e.., a term assigned to devices/nodes, for purpose of identification or grouping. Tags are also helpful to ‘Filter’, while searching for a particular device(s). To add a tag, select a node and click ![]() .
.

An additional dialog box pops open. Type in the tags and click Add/Update.
The tag is seen in the Alias column for the selected node. To delete the tag/update, follow the below steps:
![]()
Select the Node, click ![]() to edit or delete the tags, and click Add/Update
to edit or delete the tags, and click Add/Update
![]()
TJ5100-S generates alarms based on the breach of pre configured or customized thresholds and logs the occurrence of all such instances in events. The administrator/user can however choose to mask alarms for a device(s), which will stop the trigger of the alarm until unmasked.
To mask an alarm for a particular node, select the node and click ![]() .
.
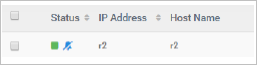
A blue (masked alarm) icon appears next to the IP address.
NOTE: Masking an alarm does not stop the polling of the Node. Only the alarms are masked.
Unmasking an alarm would enable TJ5100-S to raise alarms, as configured. To unmask an alarm for a particular node, select the node and click ![]() .
.
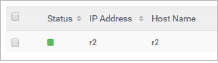
The blue (masked alarm) icon disappears from the node.
Click ![]() to view advanced filter options - to filter Nodes using one or more of the below categories:
to view advanced filter options - to filter Nodes using one or more of the below categories:
Type in the criteria to filter and click Apply filter.
Click ![]() to download the node information. The below Pop window pops up.
to download the node information. The below Pop window pops up.
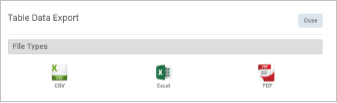
Select format. The download will start automatically.