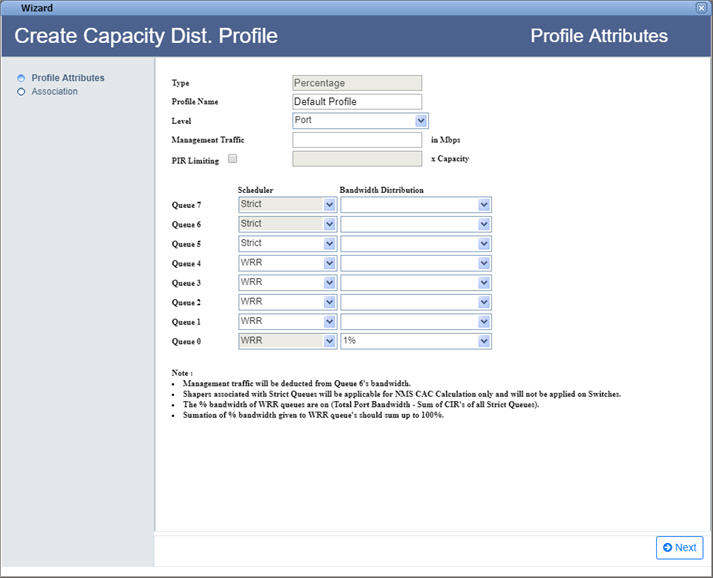
Perform the following steps to create a percentage based Capacity Distribution Profile:


User can also view the bandwidth utilization of a selected port by clicking View BW button. BW Utilization window is displayed with port details. This can be used to check whether the CDP can be applied to that port or not. If CDP cannot be applied for a particular CoS, that CoS row will be displayed in Red color.

Profile Attributes
Parameter |
Description |
Default Value |
Acceptable Values |
||
|---|---|---|---|---|---|
Type |
Displays the type of Capacity Distribution Profile being created, Percentage based or Shaper based. |
Percentage/Shaper |
-- |
||
Profile Name |
Enter a name for the Capacity Distribution Profile being created. It should begin with an alphabet. |
Default Profile |
|
||
Level |
Select the level from the options displayed in drop down list. |
Port |
Port |
||
Management Traffic |
Enter the value assigning for management traffic in Mbps. NOTE: The Management B/W value entered must be up to three decimal places and >= 0.512 Mbps. |
-- |
>0.512 Mbps |
||
PIR Limiting |
Select the check box and enter a numeric value. |
-- |
-- |
||
Queue 7 and Queue 6
|
Select/associate an Egress Shaper Profile (created through Traffic Conditioning Profile) under Bandwidth Distribution for the Strict scheduler type.
|
Scheduler |
Strict |
Strict |
|
Bandwidth Distribution |
-- |
Default Shaper |
|||
Queue 5 to Queue 1
|
Select the Scheduler type for the queue and the desired bandwidth distribution accordingly. |
Scheduler |
WRR |
|
|
Bandwidth Distribution |
-- |
0% to 100% or Default Shaper |
|||
Queue 0 |
Displays the default Scheduler type and the assigned bandwidth. The bandwidth assigned must always be a multiple of 5 for this queue. |
Scheduler |
WRR |
WRR |
|
Bandwidth Distribution |
1% |
0% to 100% |
|||
NOTE: Management traffic will be deducted from Queue 6's bandwidth. The percentage bandwidth of WRR queues are on (Total Port Bandwidth - Sum of CIR's of all Strict Queues). Summation of percentage bandwidth given to WRR queues should sum up to 100%. |
|||||
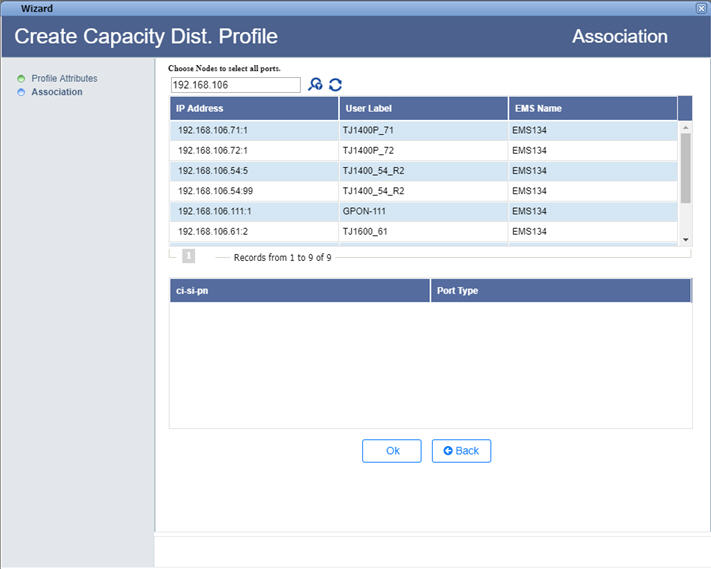
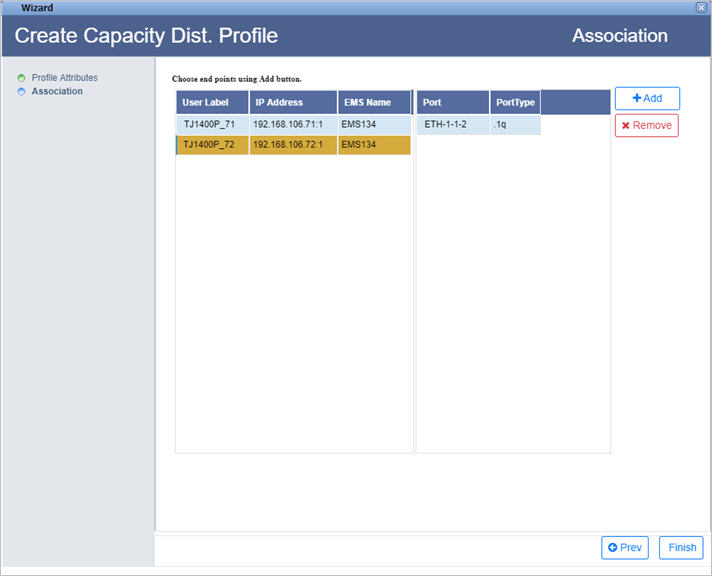
Create CDP- Association parameters
Parameter |
Description |
|---|---|
Choose Nodes to select all ports |
|
|
Search Node/Tunnel by IP Address or UserLabel button allows you to search the node/tunnel from the list. Enter the IP address or user label of the desired node/tunnel in the text box provided and click this button. |
|
Load all nodes/Tunnels button reloads/relists all the nodes in network element list. |
IP Address |
Displays the IP address of the nodes/tunnels. |
User Label |
Displays the node/tunnel identifier. |
EMS Name |
Displays the name of the EMS in which the node/tunnel is present. |
ci-si-pn |
Displays the shelf index, the slot index and the port number. |
Port Type |
Displays the port type. |