![]()
![]()
![]()
![]()
|
|
|
|
|
After the Node is Up and configurations are made, if the node goes for four consecutive crashes, then the node goes to DCN-SLAT mode. When the node goes to DCN-SLAT mode, a new node database with limited configurations would be present in the node, which is only required to provide access to the node. But the previously backed up configurations can be restored. But if the node goes for fifth consecutive crash then the node will come up in default SLAT and needs to be brought up from default SLAT page.
NOTE: If the node goes to DCN-SLAT, the node will be reachable to the user since OSPF related objects information is retained by the node. Provisioning any configuration is disallowed in this mode.
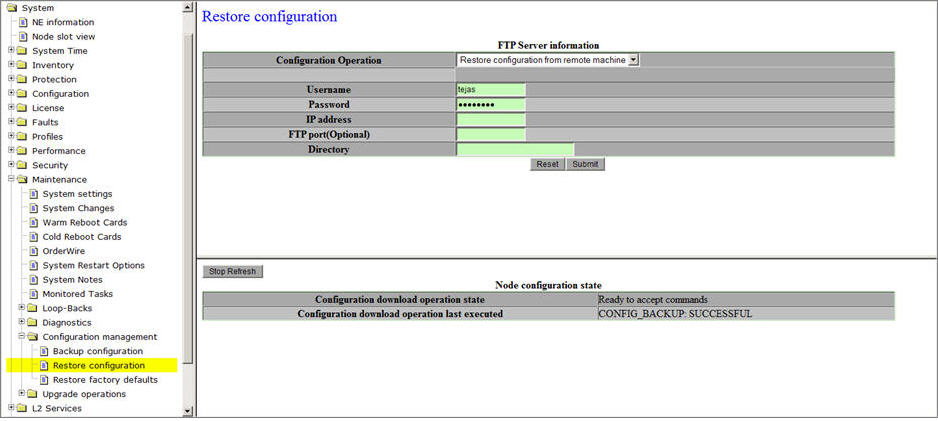
The following page is displayed when the node goes to DCN-SLAT and the alarm 'Configuration missing due to multiple crashes' on object 'SYSTEM-1' will be reported in Active alarms page. Perform Restore configuration if the configuration backup is present. Refer topic Restoring Configuration for restoring the configuration.
The following page is displayed when the node goes to default SLAT mode.
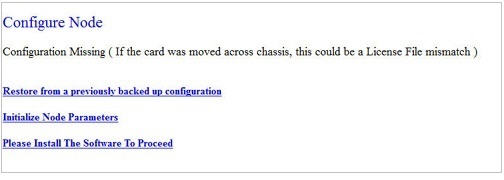
To restore from a previously backed up configuration,
Restore configuration can be performed from SLAT page. In case, the configuration backup is already present, refer to the topic Restoring Configuration for restoring the configuration.
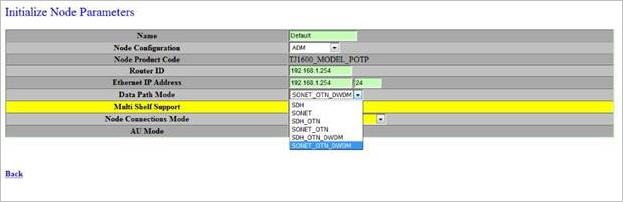
To initialize the node parameters,
To Install the software,
On initializing the node parameters, node will go for warm reboot and while the node is coming up, the software gets initialized on the NE. Once the node is up, issue a service disruptive reboot for the FPGAs to get programmed on the NE.
NOTE: After restoring the new database, the node requires a cold reboot for the new configuration to take effect. You can verify the Software Version from the description field of the default WUI page. The Software Version is in the format x.y, where 'x' and 'y' represents major and minor release, respectively.