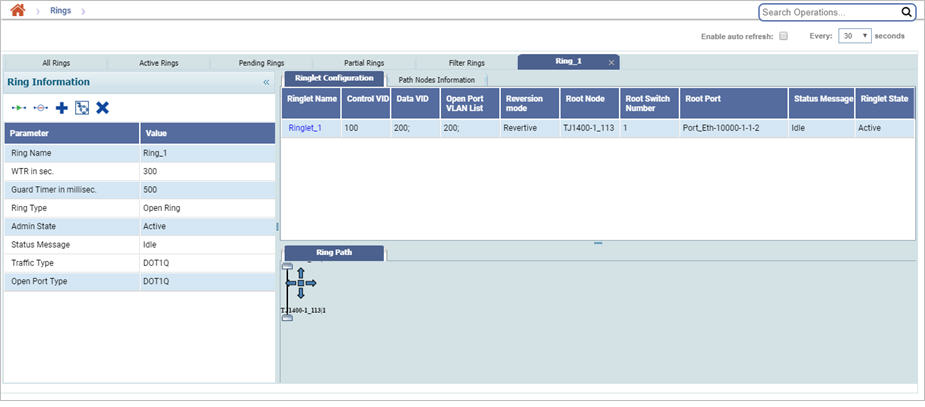
Perform the following steps to access the OAM details of ring information:
The Ring information page is displayed with a graphical view of the Ring under Ring Path tab, the ring details under Path Nodes Information tab, and ringlet details under Ringlet Configuration tab.

View Ringlet parameters
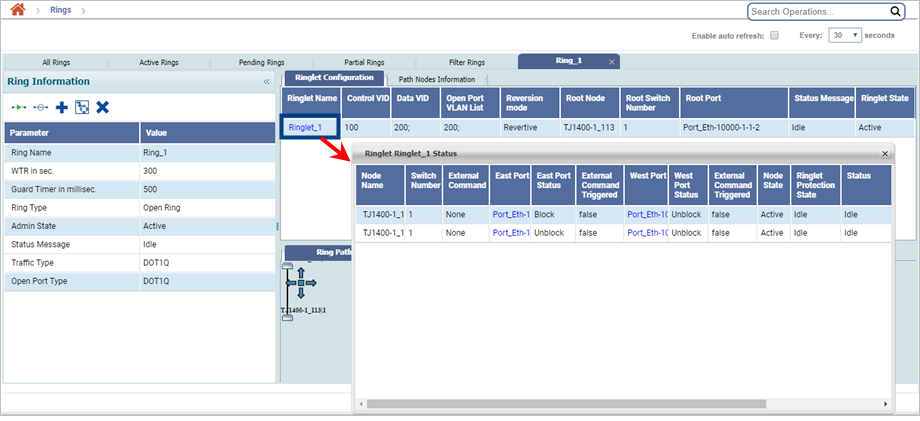
On Ring information page, under Ringlet Configuration tab, click the desired Ringlet Name link. The parameters of the ringlet name are displayed.

Ringlet Configuration and Path Nodes Information Tab parameters
Parameter |
Description |
|---|---|
Ringlet Configuration |
|
Ringlet Name |
Displays the unique ringlet name. Also allows you to click the link and view the ringlet status. |
Control VID |
Displays the VLAN IDentifier of the Control VLAN. |
Data VID |
Displays the data VLAN ID protected by Ringlet. |
Reversion Mode |
Displays the mode of the reversion. |
Root Node |
Displays the name of the RPL owner nde. |
Root Switch Number |
Displays the switch number of the root node. |
Root Port |
Displays the root port ID. |
Status Message |
Displays the status of the ongoing provisioning request if any is sent. |
Ringlet State |
Displays the provisioning status of the ringlet. State can be active, pending or partially provisioned. |
Path Nodes Information |
|
Node Name |
Displays the name of the node. |
Switch Number |
Displays the switch number. |
East Port |
Displays the east port of the node. |
East Port Protected Ring Name |
Displays the ring name of the ring which was created first on the east port. |
East Port Shared |
Displays whether the east port is shared or not. |
West Port |
Displays the West port of the node. |
West Port Protected Ring Name |
Displays the ring name of the ring which was created first on the west port. |
West Port Shared |
Displays whether the west port is shared or not. |
NOTE: An additional column appears for open port vlan list if the ring selected is open ring. |
|
Ring Path |
|
Displays a graphical representation of the ring. Basic information of a node participating in ring formation is displayed as a screentip when the cursor is pointed to it. |
|
Ringlet Name Parameters
Parameter |
Description |
|---|---|
Node Name |
Displays the name of the node. |
Switch Number |
Displays the switch number. |
East Port |
Displays the East port of the node. |
East Port Status |
Displays the ERP port ringlet status. |
West Port |
Displays the West port of the node. |
West Port Status |
Displays the ERP port ringlet status. The state can be either true or false. |
Node State |
Displays the state of the ringlet provisioning on the existing node. This can be active or pending. |
Ringlet Protection State |
Displays the ringlet protection state. The state can be Idle in normal condition; Protect if link failure occurs. |
Status |
Displays the status of the last provisioning request sent for the ringlet. |
The different actions that can be performed from the Ring Information column are as follows:
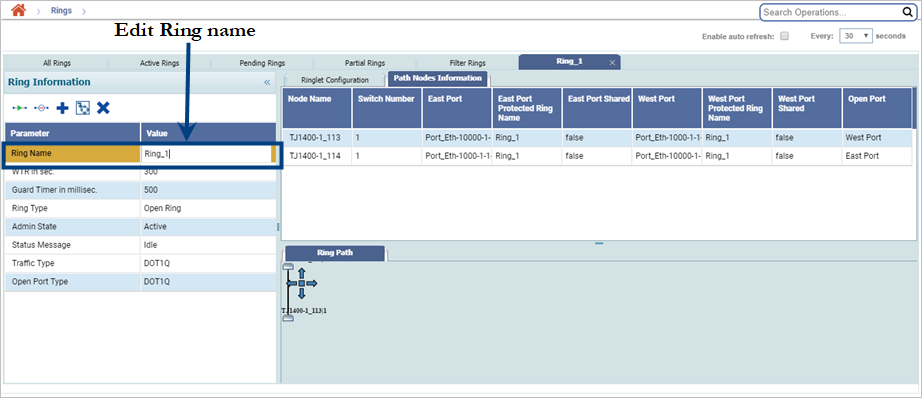
Action: Edit Ring name
Perform the following steps to edit/modify the ring name:

Action: Activate
Perform the following steps to activate a ring or its ringlet(s):
Action: Deactivate
Perform the following steps to deactivate a ring or its ringlet(s):
The user is required to authenticate the deactivation of ring.
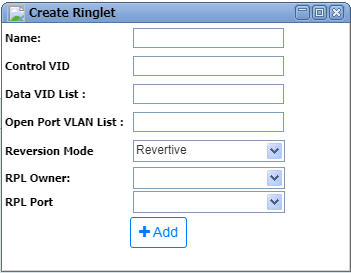
Action: Add Ringlet

Create Ringlet parameters
Parameter |
Description |
|---|---|
Name |
Enter the unique Ringlet name. The characters supported are A to Z, a to z, 0 to 9, _(underscore), -(hyphen), .(dot), &(ampersand), space. |
Control VID |
Enter the VLAN IDentifier of the Control VLAN. |
Data VID List |
Enter the data VLAN ID protected by Ringlet. |
Reversion Mode |
Select the required mode from the list - Reversion, Non-Reversion. |
RPL Owner |
Ring Protected Link (RPL) owner. The RPL owner has a RPL port and a non-RPL port. Under normal working condition, the RPL owner blocks traffic through the RPL port for the data VLANs that are protected by the ringlet. |
RPL Port |
An RPL port is present on an RPL owner. The RPL port is blocked under normal working conditions. The RPL owner unblocks the RPL port after receiving RAPS (SF) messages from other nodes. |
NOTE: An additional column appears for open port vlan list if the ring selected is open ring. On adding ringlet to an already provisioned ring, the ring moves into partially provisioned state. The new ringlet state is shown as pending. The earlier ringlets state continues to be in active.
Action: Delete Ringlet
Perform the following steps to delete the selected ringlet(s) of a ring:
NOTE: Atleast one ringlet should be left after deletion.