User can select multiple services and enable/disable or view Y1731 Management. Values for the parameters Y1731 Enabled and Y1731 Granularity gets updated on Manage Services page on enabling the PM for selected service(s).
Enable Y1731 OAM PM
NOTE 1: Y1731 is not supported for DOT1Q and DOT1AD services.
NOTE 2: Enabling and viewing of Y1731 Management options is applicable to service in 'active state' only.
Perform the following steps to enable Y1731 OAM management on selected service(s):
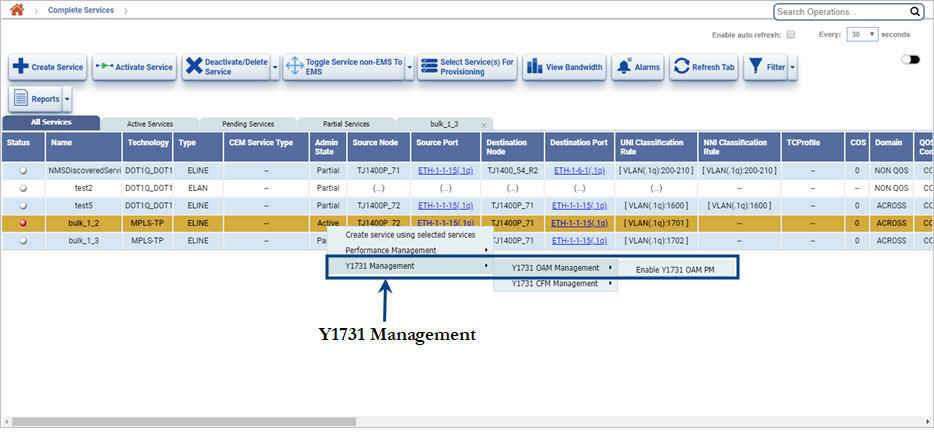
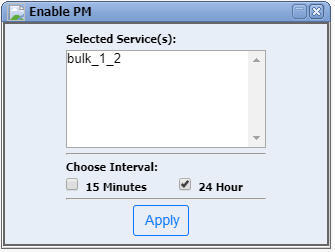
The Y1731 OAM Management options for the services are as follows:
Disable Y1731 OAM PM
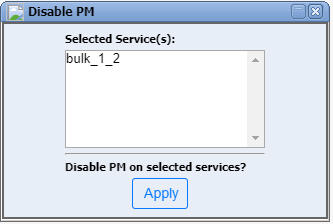
Perform the following steps to disable Y1731 Management on Y1731 enabled service(s):
Generate 24Hr PM History Report
Perform the following steps to generate the 24Hr PM History report:
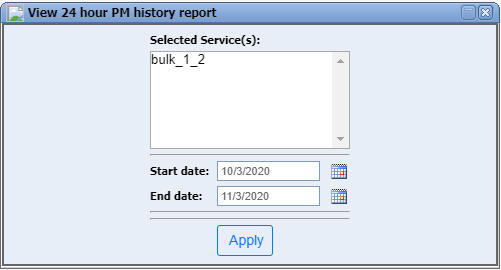
To save all tables in the report in PDF format, click the PDF icon; or
To save individual tables in the report, select the desired format from the Export Option drop down menu against that table.
View current 15Min/24Hr Y1731 OAM PM
Perform the following steps to generate the current 15Min/24Hr Y1731PM report:
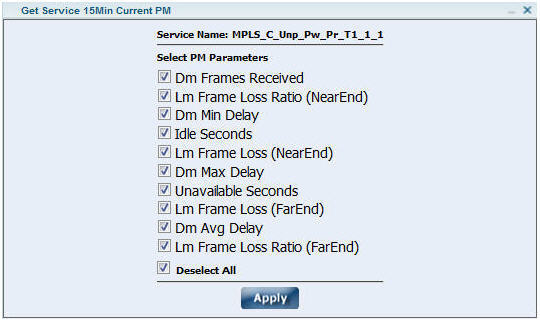
To save all tables in the report in PDF format, click the PDF icon; or
To save individual tables in the report, select the desired format from the Export Option drop down menu against that table.
View previous 15Min/24Hr Y1731 OAM PM
Perform the following steps to generate the previous 15Min/24Hr Y1731PM report:
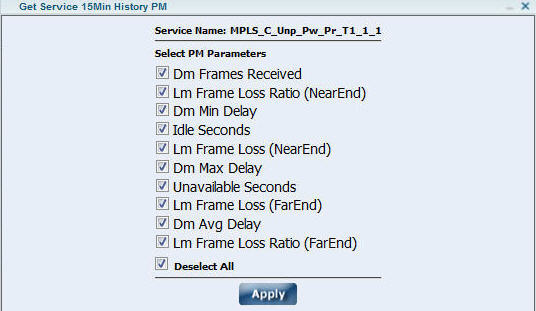
To save all tables in the report in PDF format, click the PDF icon; or
To save individual tables in the report, select the desired format from the Export Option drop down menu against that table.
Y1731 OAM Management Data
Parameter |
Description |
|---|---|
Current 15Min/24Hr and Previous 15Min/24Hr Y1731 OAM PM Data |
|
Dm Frames Received |
Displays the number of DM frames received. |
Lm Frame Loss Ratio (NearEnd) |
Displays the number of frames lost ratio at near end. |
Dm Min Delay |
Displays the round trip time of DM (minimum). |
Idle Seconds |
Idle second counter will increment when there is no Tx and Rx transmission and there is no alarm in the tunnel path. |
Lm Frame Loss (NearEnd) |
Displays the frame loss that is associated with ingress data frames. The near-end frame loss measurements contribute to near-end severely errored seconds. |
Dm Max Delay |
Displays the round trip time of DM (maximum). |
Unavailable Seconds |
Displays the Unavailable seconds in an Ethernet Client traffic. |
Lm Frame Loss (FarEnd) |
Displays the frame loss that is associated with egress data frames. The far-end frame loss measurements contribute to far end severely errored seconds. |
Dm Avg Delay |
Displays the round trip time of DM (average). |
Lm Frame Loss Ratio (FarEnd) |
Displays the number of frames lost ratio at far end. |
Enable Y1731 CFM PM
Perform the following steps to enable Y1731 CFM management on selected service(s):
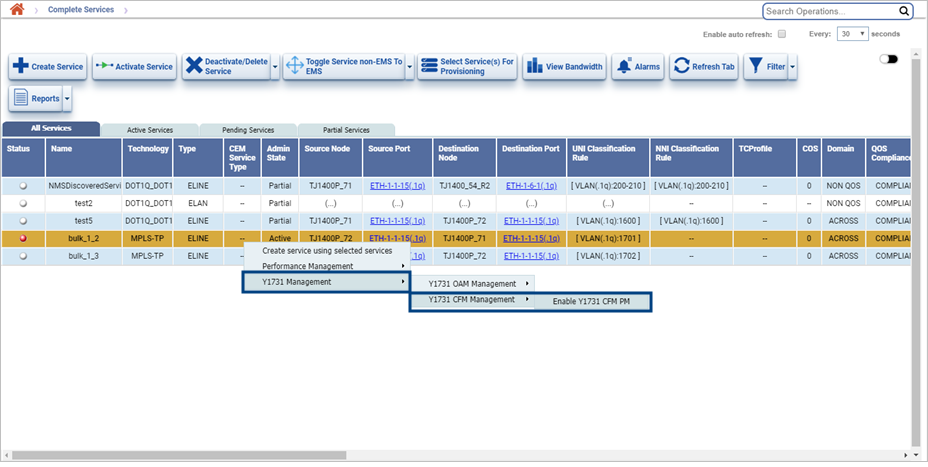
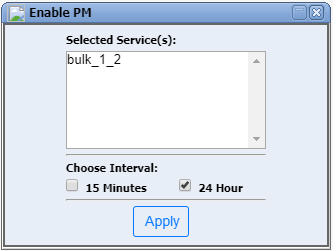

NOTE: Y1731 CFM PM can be enabled, if CFM is enabled on Service(s). To enable CFM,
i) Go to Configuration > Layer 2 > Services menu and click Complete Services option. The Complete Services page is displayed.
ii) Select the desired tab and double-click the desired service. The details of the selected service is opened in a new tab on Manage Services page.
iii) Under Service Information column of the selected service tab, click ![]() (Enable) and select the CFM-Y.1731 radio button. A confirmation message is displayed. Click OK. CFM enabled Successfully message is displayed. Click OK.
(Enable) and select the CFM-Y.1731 radio button. A confirmation message is displayed. Click OK. CFM enabled Successfully message is displayed. Click OK.
The Y1731 CFM Management options for the services are as follows:
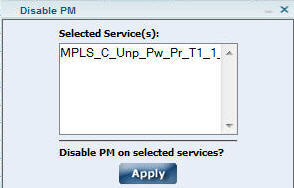
Disable Y1731 CFM PM
By default, the Y1731PM option is disabled. Perform the following steps to disable Y1731 Management on Y1731 enabled service(s):
Generate 24Hr PM History Report
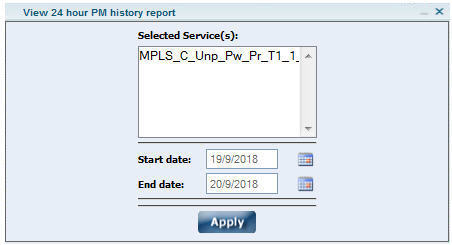
Perform the following steps to generate the 24Hr PM History report:
To save all tables in the report in PDF format, click the PDF icon; or
To save individual tables in the report, select the desired format from the Export Option drop down menu against that table.
View current 15Min/24Hr Y1731 CFM PM
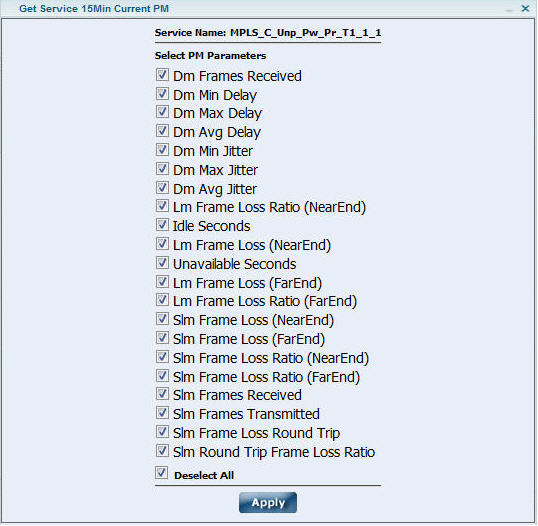
Perform the following steps to generate the current 15Min/24Hr Y1731PM report:
To save all tables in the report in PDF format, click the PDF icon; or
To save individual tables in the report, select the desired format from the Export Option drop down menu against that table.
View previous 15Min/24Hr Y1731 CFM PM
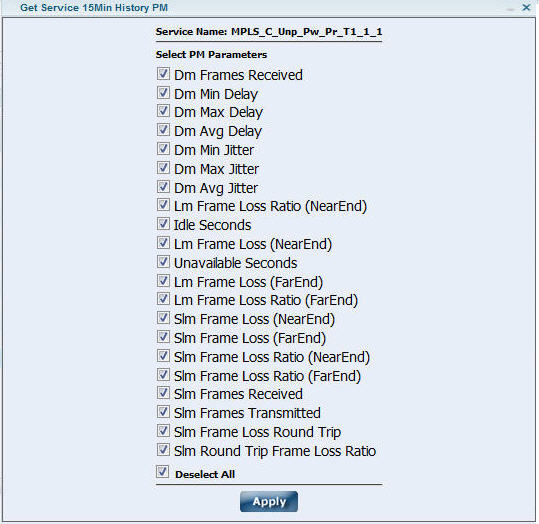
Perform the following steps to generate the previous 15Min/24Hr Y1731PM report:
To save all tables in the report in PDF format, click the PDF icon; or
To save individual tables in the report, select the desired format from the Export Option drop down menu against that table.
Y1731 CFM Management Data
Parameter |
Description |
|---|---|
Current 15Min/24Hr and Previous 15Min/24Hr Y1731 CFM PM Data |
|
Dm Frames Received |
Displays the number of DM frames received. |
Dm Min Delay |
Displays the round trip time of DM (minimum). |
Dm Max Delay |
Displays the round trip time of DM (maximum). |
Dm Avg Delay |
Displays the round trip time of DM (average). |
Dm Min Jitter |
Displays the minimum jitter observed in that time interval. |
Dm Max Jitter |
Displays the maximum jitter observed in that time interval. |
Dm Avg Jitter |
Displays the average jitter observed in that time interval. |
Lm Frame Loss Ratio (NearEnd) |
Displays the number of frames lost ratio at near end. |
Idle Seconds |
Idle second counter will increment when there is no Tx and Rx transmission and there is no alarm in the tunnel path. |
Lm Frame Loss (NearEnd) |
Displays the frame loss that is associated with ingress data frames. The near-end frame loss measurements contribute to near-end severely errored seconds. |
Unavailable Seconds |
Displays the Unavailable seconds in an Ethernet Client traffic. |
Lm Frame Loss (FarEnd) |
Displays the frame loss that is associated with egress data frames. The far-end frame loss measurements contribute to far end severely errored seconds. |
Lm Frame Loss Ratio (FarEnd) |
Displays the number of frames lost ratio at far end. |
Slm Frame Loss (NearEnd) |
Displays the SLM frame loss at near end. |
Slm Frame Loss (FarEnd) |
Displays the SLM frame loss at far end. |
Slm Frame Loss Ratio (NearEnd) |
Displays the number of SLM frames lost ratio at near end. |
Slm Frame Loss Ratio (FarEnd) |
Displays the number of SLM frames lost ratio at far end. |
Slm Frames Received |
Displays the number of SLM frames received. |
Slm Frames Transmitted |
Displays the number of SLM frames transmitted from the near end MEP. |
Slm Frame Loss Round Trip |
Displays the sum of SLM frame loss at near and far end. |
Slm Round Trip Frame Loss Ratio |
Displays the ratio of SLM Round Trip frame Loss to the SLM frames transmitted. |
NOTE: Steps to View current 15Min/24Hr Y1731PM and previous 15Min/24Hr Y1731PM are same.