![]()
![]()
![]()
![]()
|
|
|
|
|
Adding Virtual LAN (VLAN) support to a Layer 2 switch offers some of the benefits of both bridging and routing. Like a bridge, a VLAN switch forwards traffic based on the Layer 2 header, which is fast, and like a router, it partitions the network into logical segments, which provides better administration, security and management of multicast traffic.
A VLAN is a set of end stations and the switch ports that connect them. You may have many reasons for the logical division, such as department or project membership. The only physical requirement is that the end station and the port to which it is connected both belong to the same VLAN.
Each VLAN in a network has an associated VLAN ID, which appears in the IEEE 802.1Q tag in the Layer 2 header of packets transmitted on a VLAN. An end station may omit the tag, or the VLAN portion of the tag, in which case the first switch port to receive the packet may either reject it or insert a tag using its default VLAN ID. A given port may handle traffic for more than one VLAN, but it can only support one default VLAN ID.
Use the VLAN Configuration page to define VLAN groups stored in the VLAN membership table. Your switch supports up to 4091 VLANs. VLAN 1 is the default VLAN of which all ports are members. To display the VLAN Configuration page, click Switching > VLAN > Configuration in the navigation menu.
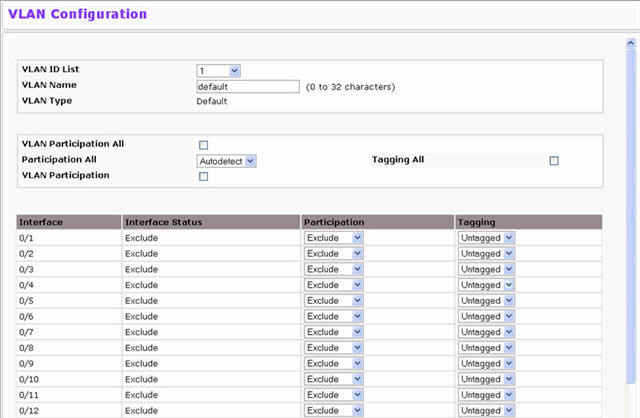
VLAN Configuration Fields
Field |
Description |
|---|---|
VLAN ID List |
You can use this screen to create a new VLAN or delete or reconfigure an existing VLAN. Use this pull-down menu to select one of the existing VLANs, or select Create to add a new one. |
VLAN ID - Individual/ Range |
When Create is select from the VLAN ID List, specify the VLAN Identifier for the new VLAN. You can also enter a range of VLAN IDs. |
VLAN Name |
Use this optional field to specify a name for the VLAN. It can be up to 32 alphanumeric characters long, including blanks. The default is blank. VLAN ID 1 is always named "Default." |
VLAN Type |
This field identifies the type of the VLAN you are configuring. You cannot change the type of the default VLAN (VLAN ID = 1): it is always type "Default." When you create a VLAN, using this screen, its type will always be "Static." A VLAN that is created by GVRP registration initially has a type of "Dynamic." You can use this pull-down menu to change its type to "Static". |
Participation All |
Select this field to apply the same VLAN participation and tagging settings to all ports. Use this field to specify whether all the ports will participate in this VLAN. The factory default is Autodetect. The possible values are:
|
Tagging All |
Select the tagging behavior for all the ports in this VLAN. The factory default is Untagged. The possible values are:
|
VLAN Participation |
Select this field to specify per-port VLAN participation and tagging settings. |
Interface |
Indicates which port is associated with the fields on this line. |
Status |
Indicates the current value of the participation parameter for the port. |
Participation |
Use this field to specify whether a port will participate in this VLAN. The factory default is "Autodetect." The possible values are:
|
Tagging |
Select the tagging behavior for this port in this VLAN. The factory default is "Untagged." The possible values are:
|
If you make any changes to the page, click Submit to apply the changes to the system. To delete a VLAN, select the VLAN from the VLAN ID and Name field, and click Delete. You cannot delete the default VLAN.
Use the VLAN Status page to view information about the VLANs configured on your system. To access the VLAN Status page, click Switching > VLAN > Status in the navigation menu.
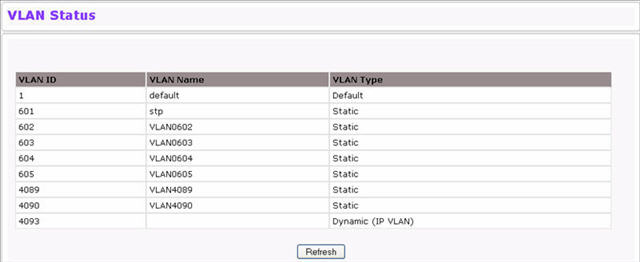
VLAN Status Fields
Field |
Description |
|---|---|
VLAN ID |
The VLAN Identifier (VID) of the VLAN. The range of the VLAN ID is 1 to 4093. |
VLAN Name |
The name of the VLAN. VLAN ID 1 is always named Default. |
VLAN Type |
The VLAN type, which can be one of the following:
|
Use the VLAN Port Configuration page to configure a virtual LAN on a port. To access the VLAN Port Configuration page, click Switching > VLAN > Port Configuration in the navigation menu.
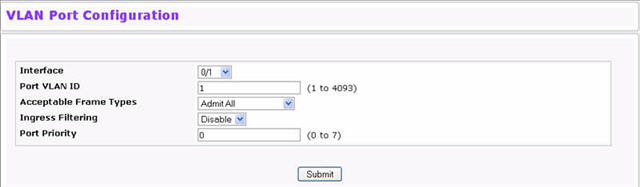
VLAN Port Configuration Fields
Field |
Description |
|---|---|
Interface |
Select the interface for which you want to display or configure data. Select All to set the parameters for all ports to same values. |
Port VLAN ID |
Specify the VLAN ID you want assigned to untagged or priority tagged frames received on this port. The factory default is 1. |
Acceptable Frame Types |
Specify how you want the port to handle untagged and priority tagged frames. Whichever you select, VLAN tagged frames will be forwarded in accordance with the IEEE 802.1Q VLAN standard. The factory default is Admit All.
|
Ingress Filtering |
Specify how you want the port to handle tagged frames:
|
Port Priority |
Specify the default 802.1p priority assigned to untagged packets arriving at the port. |
If you change any information on the page, click Submit to apply the changes to the system.
Use the VLAN Port Summary page to view VLAN configuration information for all the ports on the system.To access the VLAN Port Summary page, click Switching > VLAN > Port Summary in the navigation menu.
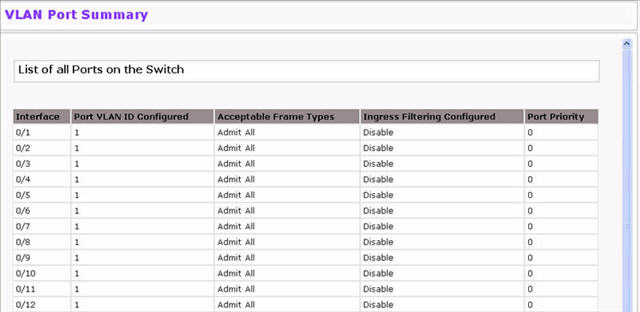
VLAN Port Summary Fields
Field |
Description |
|---|---|
Interface |
Identifies the physical interface associated with the rest of the data in the row. |
Port VLAN ID Configured |
Identifies the VLAN ID assigned to untagged or priority-tagged frames received on this port. The factory default is 1. |
Port VLAN ID Current |
Displays the actual VLAN ID in use for the port. If the port was acquired by another module, the actual value may differ from the configured VLAN ID. |
Acceptable Frame Types |
Indicates how the port handles untagged and priority tagged frames.
|
Ingress Filtering |
Shows how the port handles tagged frames
|
Port Priority |
Identifies the default 802.1p priority assigned to untagged packets arriving at the port. |
Click Refresh to reload the page and view the most current information.
Use the Reset Configuration page to return all VLAN parameters for all interfaces to the factory default values. To access the Reset Configuration page, click Switching > VLAN > Reset Configuration in the navigation menu.
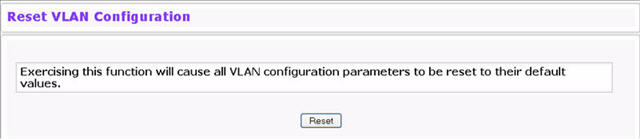
When you click Reset, the screen refreshes, and you are asked to confirm the reset. Click Reset again to restore all default VLAN settings for the ports on the system.
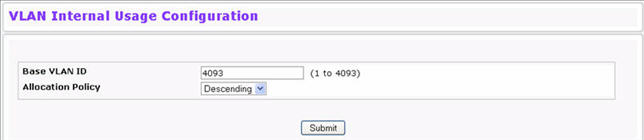
Use the VLAN Internal Usage Configuration page to assign a Base VLAN ID for internal allocation of VLANs to the routing interface. To access the VLAN Internal Usage page, click Switching > VLAN > Internal Usage Configuration in the navigation menu.
VLAN Internal Usage Configuration Fields
Field |
Description |
|---|---|
Base VLAN ID |
The Base VLAN ID for Internal allocation of VLANs to the routing interface. |
Allocation Policy |
Allocation Policy for VLAN ID in ascending or descending order. |
Use the VLAN Internal Usage page to view internal allocation of VLANs to the routing interface. To access the VLAN Internal Usage page, click Switching > VLAN > Internal Usage in the navigation menu.
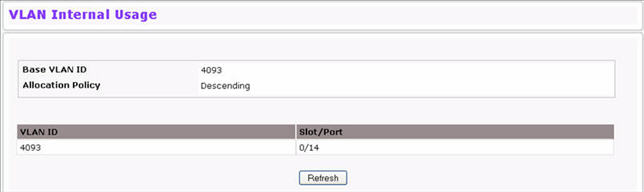
Click Refresh to display the latest information from the router.